Connecting 3D printers
You can add a DMG 3D printer at any time via the 3D printer menu in the header menu to use features such as multi-file printing and direct printing of cases from DentaMile connect.
To connect a new 3D printer, click on “3D printer” in the header menu.

After clicking on the “Connect to new 3D printer” button, you must select which 3D printer you are using.


The list first shows an overview of DMG 3D printers, followed by other supported printers from other manufacturers.
If you select a DMG 3Demax or DMG 3Delite, you must also specify the post-exposure type.
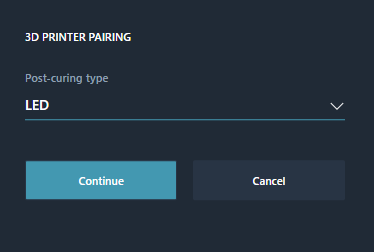
Once you have selected the post-exposure type and clicked “Continue”, a 6-digit code will appear at the top of the menu, which you must enter on your 3D printer.

Once your 3D printer is connected, you will find it in the list.
![]()
The sun indicates that the “LED” exposure type has been selected for the printer. If a flash is displayed there, then the “FLASH” exposure type has been selected.
The circle with the number inside indicates how many print jobs are in the queue on the 3D printer.
The control icon takes you to a settings menu. There you can edit the name of the printer, change the post-exposure type, and delete the 3D printer from the list.
Virtual printers
If you do not have a printer, you can connect a virtual printer. This can only be done by selecting “DMG Virtual Printer”. Clicking on this printer opens an overlay where you can choose from all currently supported printers.

Select a printer here and click “Create” to add a new printer to the list of connected printers.